Work for a show at Schaller Gallery just went out the door, so I’ve had a little time to do studio clean-up and some research. I had a piece that I’d surfaced at the ends, planning some decal shapes in the center, and a large serving tray that didn’t pass my inspection that I hoped I could make a bit more attractive with decal intervention and use around the house.
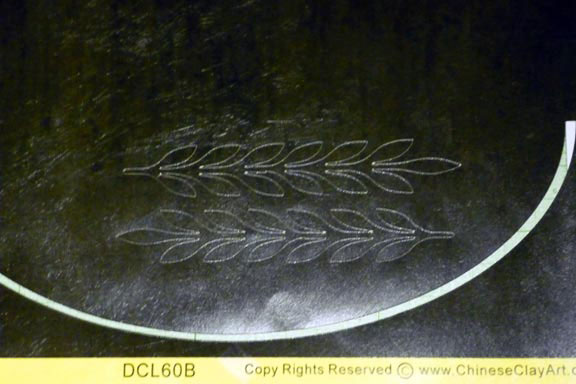
There is a company that is developing non-toxic decals, some of which may be safe enough unfired for use by children. This would be a great boon for functional potters. Traditionally, many China paint and ceramic decal products are fluxed with lead. I have some samples of their sheets of solid decal color (not yet for sale), as well as some sheets of solid ceramic decal color from Chinese Clay Art (13″ x 20″, 8.00, probably NOT food safe).
With Make-The-Cut software, I made an 11″ x 7″ oval, did a nested duplicate where I could set the width – the software will make and center a smaller duplicate of the shape – and made a band that would be the size of the bottom of my platter. I wanted a crisp, solid black line to anchor the bottom of the composition and make the wimpy, pale ground look like a contrast.

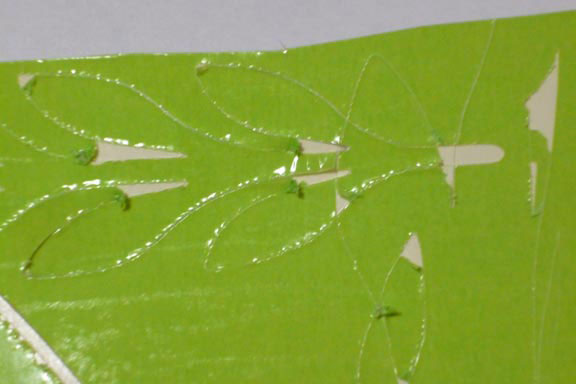
Below left, the cut shape left on the sticky cutting mat that goes through the die cutter bed. Right, the sheet of decal medium that was peeled up to reveal the cut shape. Removing things other than the cut shape from the mat is called “weeding”. This was very simple, but if you do elaborate shapes with a lot of interior cut-outs, it can involve some time to weed all the negative spaces.

Below, the arc applied to the platter. The arc was cut in several places so that it appears the leaves come in front of the arc. It would have been good to have a “before” image as well. The arc grounds things and makes a better value contrast with the light ground color. The decal color is probably not food safe, and would not be used in a situation where I would not control the platter’s use. Acid foods could cause lead to leach. This is a small shape, and the amount of lead would be small, but not a good practice. I will keep this, and NOT serve pasta with tomato sauce in it. The most important part of this exercise is the experiment with the die cutter and decal medium to see what’s possible. I recommend using potentially toxic decal media on the outside of functional pottery only.

The green sample of the non-toxic decal medium cut poorly. The decal medium was stretchy and tore in cutting, and pulled off the backing easily. Not good for use with a die cutter at this point. Settings for the cutter were the same for both decal sheets. Offset .35, force 110, speed 10/10, single pass.
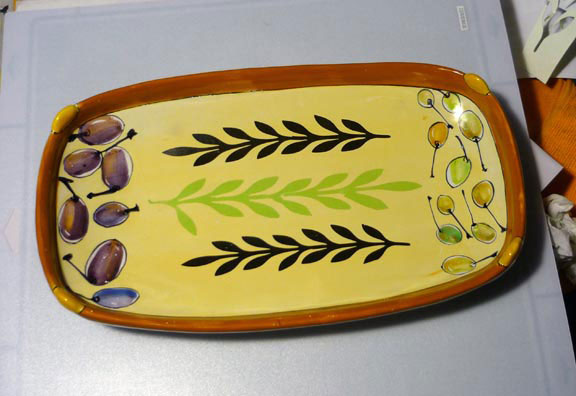
The test tray with shapes in both the green non-toxic sample decal medium, and the Chinese Clay Art black. Applying the cut decal forms is a new challenge. In using a traditional decal printed onto a clear base, a large, simple shape may be cut and applied because the clear ground medium will either burn away, or clear cover coat will melt into the surface. With intricate cuts, the decal loosens from the backing, and can easily fold over and stick to itself or wrinkle, making a poor application. I found I had to put the decal face-down on my hand, carefully peel up the backing, then coax it onto the ceramic surface from my hand by pressing it down. I’m still working of developing moves on this. The wet decal stretches a bit, so just sliding the backing out from under the leaf shapes made the backing catch on the lower forms and decals fold onto themselves. Ew. I also tried peeling back the first half inch of backing, putting the exposed decal onto the form, and then gently peeling back the backing in a U shape while lowering the rest of the exposed decal. These problems are much simpler with silk-screened decals than they are with complex cut shapes.
Learning to use the die cutter is a lot of fun for me. Not sure where it goes in terms of my aesthetic, but it offers the opportunity to do things not easily done with majolica and a brush, like crisp, precise shapes, text, dense, solid color. Also good for touch-ups and revisions.
Kiln is cooling. Looking forward to the results.
Bottom line: new problems found.
- The specific decal medium makes a difference in how it cuts. Not all are equal for die-cutter use, although they may work well with scissors.
- applying intricate cut shapes is no picnic and poses challenges of its own. People doing scrapbooking use transfer tape to keep shapes in place during transfer. Artist Garth Johnson has done a version of this with his gold decal demo. See http://unconsumption.tumblr.com/post/11577549664/garth-johnson-joins-the-uncollection-using
Thanks Linda! This is really good stuff. Thanks for sharing! I have had real problems getting my intricate decals onto pieces, so I started cutting a simple border around the decal and applying the whole of it to the piece. Rather than weeding the decal on the sheet before applying it, I apply the die cut decal with this extra bit of material to the pot and then weed it out there. It helps a little bit to keep things in place. But still, sometimes things get tangled.
Thanks, Kathy. Sounds like a good strategy. Will try next time I’m doing cuts.
Thank you Linda, for sharing your research. What I think you are saying is that the green sheets of non toxic decal material does not fare well with the die cutter. Are you applying
onto fired ware or green on top of the majolica?
Yes, the green does not cut well. I’ve tried it before with different settings. Problem is that it’s not crisp enough and comes off the backing too easily in the raw, dry state. I will forward my thoughts to the company and hope that their development people might be interested enough to try to remedy this. Right now, I think making something that low-temperature non-toxic is tough, and to make it kid-safe raw is even tougher. They say that perhaps they may only be able to do this with certain colors.
The decal shapes are applied on top of fired glaze, and given a 3rd firing to cone 017. This would be the same for any temperature glaze.